Getting Started with Templates
Development on the Ootle, at its most basic, begins with the templates and smart contracts generated from them. These are the foundational blocks required to perform any Ootle specific functions.
But what are these? Think of a template as a specification for a smart contract. From a template, a user can create a smart contract for anything from a simple counter system to a fully-fleged NFT series. This contract then exists on its own, independent of the template, and can be used to perform specific actions.
The community has focused on developing many templates for common activities envisioned for the Ootle with security and stability in mind. Rather than reinvent the wheel every time you would like to, for example, create an NFT series, you can leverage the templates that have been incorporated into the template library. However, for your own unique services or requirements, you may need to create your own.
To develop within the Ootle (both apps or Tari templates), you're going to need the following:
- The Tari CLI for quick scaffolding of template projects
- The
tari_template_libdependency - Compile the template into WebAssembly (WASM) and commit it to the network.
This guide assumes some basic knowledge of Git, Cargo and Rust, as well as a general grasp of Ootle's fundamental concepts
Rust Template Documentation
Documentation for the tari_template_lib can be found here
Basic Concepts of the Ootle
- Runtime Environment: The runtime environment handles various elements such as buckets, proofs, substates, and components. It provides methods for manipulating these elements and managing their interactions. This includes the Tari Virtual Machine (TVM)
- Workspace: Manages variables and proofs, providing methods to insert and retrieve indexed values. It's a localised instance of the variables required when performing a transaction against a smart contract that exists within the TVM.
- Templates: A reusable, parameterized smart contract compiled to WASM and submitted to Ootle. Templates define logic for components and exist as special substates. Example: an NFT template defines how NFTs are created and behave
- Component: A reusable and addressable entity with associated state and methods. A component is a instantiated template, representing a live, stateful contract on the network. e.g. calling an NFT contract will
- Bucket: Handles resources within the component or workspace. Buckets are used to securely move data between vaults.
- Vault: Securely stores resources and manages access control. An example of a vault is a collection of tokens, which needs to be updated as people withdraw or deposit more tokens into the vault.
The basic structure of a template
We'll go through a simple template that will introduce you to the structure of a template and the core elements that are utilised. Below is the code for a template that will create a simple counter: a component on the network that has an unsign
use tari_template_lib::prelude::*;

#[template]

mod counter {
    pub struct Counter {
        value: u32,  // Contract state
    }

    impl Counter {
        // Method to create a new contract instance
        pub fn new() -> Self {
            Self { value: 0 }
        }

        // A read-only method
        pub fn value(&self) -> u32 {
            self.value
        }

        // A method that updates the contract state
        pub fn increase(&mut self) {
            self.value += 1;
        }
    }
}
This line imports all of the functions, types, macros and traits grouped within the prelude module of the Tari template library, tari_template_lib. When you compile this code, you will have access to all the functions necessary to interact with the Tari blockchain through these standardised templates. But how?
This is partly explained by the second line:
This a unique attribute macro within the Tari template library. This will allow rust to compile this basic code in such a way to generate the necessary code for interacting with the blockchain. So, for example, the following code:
Creates a custom data type that stores an integer value in Rust. But how does one "store" a value on the blockchain? The template macro we've selected interprets this instruction and then builds code around it for blockchain interaction. You're still creating a custom data type that can be modified, but the template macro understands what to add to the struct to store it on the blockchain. In this case, the value is stored as the Component's state.
Lastly, we have several methods for interacting with the value state contained within the implementation block:
    impl Counter {
        // Method to create a new contract instance
        pub fn new() -> Self {
            Self { value: 0 }
        }

        // A read-only method
        pub fn value(&self) -> u32 {
            self.value
        }

        // A method that updates the contract state
        pub fn increase(&mut self) {
            self.value += 1;
        }
    }
These are the means that we are going to intereact with the data type we've created in the Counter structure.
Using this template, we can create a new counter component on the network (so we can have multiple Counter components running at each of their Component addresses), a method to call the current value of the counters, and a method to increase any counter's value by 1.
Common modules on the Ootle
While this details the basic structure, you may have several questions. How do I control who has access to this template, or the components created from them? If I wanted to make my own token, how would I represent it? How exactly does the Ootle "execute" a template?
Template Library Components
Below are several of the core tools used when developing templates:
| Component | Description |
|---|---|
| ResourceBuilder | Creates Resources of different types by calling on specific builders (fungible, NFT, etc.) |
| ResourceManager | Manages existing Resources on Ootle, allowing for minting, burning, and other functions. |
| ComponentManager | . |
| Vault | Stores and manages resources securely inside a Component. | | Bucket | Temporary holder for resources during transfer or method calls. |
| AccessRules | Sets specific access levels on Components and Resources. | | Context | Provides information about the caller and transaction. | | ComponentAddress/TemplateAddress | References to components/templates for interaction. | | MetaData | | call_method!/args! | Macros for cross-component calls and argument packaging. |
ResourceBuilder
The ResourceBuilder is a tool for creating new digital assets, such as fungible tokens (like currencies or game cards) and non-fungible tokens (NFTs, like unique collectibles). It provides a flexible, structured way to define the properties, permissions, and initial supply of these resources before they are deployed to the blockchain. With ResourceBuilder, you specify crucial details such as the resource type (fungible, non-fungible or confidential), metadata like name and description, ResourceAccessRules for minting and burning, and ownership permissions using OwnerRule. Once configured, the builder constructs the resource and returns both a manager for future operations and an initial bucket of tokens or NFTs which can be deposited into the vault.
Example:
Assume you wanted to create a Collectible Card Game (CCG) with a standard set of cards, with the unique draw being that every pack of cards bought by your players has a chance at a unique, randomly generated card with unique stats.
To create a regular card type in your collectible card game, you could use:
// Standard card resource (fungible)
let (card_manager, card_bucket) = ResourceBuilder::fungible()
    .with_owner_rule(OwnerRule::Signature(game_owner_pubkey))
    .with_access_rules(AccessRules::new().mint(Rule::require_owner()))
    .with_metadata(Metadata::from_iter([
        ("name", "Fire Dragon"),
        ("rarity", "Rare"),
        ("type", "Regular"),
        ("stats", "Attack: 7, Defense: 5"),
    ]))
    .initial_supply(0)
    .build();
And for unique, one-of-a-kind cards, you would use:
// Unique card resource (non-fungible NFT series)
let (unique_card_manager, _) = ResourceBuilder::non_fungible()
    .with_owner_rule(OwnerRule::Signature(game_owner_pubkey))
    .with_access_rules(AccessRules::new().mint(Rule::require_owner()))
    .with_metadata(Metadata::from_iter([
        ("series", "Unique Card Series"), // Series-level metadata
        ("description", "One-of-a-kind collectible cards"),
    ]))
    .build();

// When minting a unique card (NFT), include metadata that matches the regular card structure
let unique_card_metadata = Metadata::from_iter([
    ("name", generate_random_name()),           // Random name
    ("rarity", generate_random_rarity()),       // Random rarity
    ("type", "Unique"),                         // Type marked as Unique
    ("stats", generate_random_stats()),         // Random stats
]);

let unique_id = NonFungibleId::random();
let unique_card_bucket = unique_card_manager.mint_non_fungible(
    unique_id,
    &unique_card_metadata,
    &Metadata::default(), // Optional: mutable data
);
By leveraging the ResourceBuilder together with AccessRules, OwnerRule, and Metadata, you ensure your game’s assets are created securely and flexibly, supporting both the unlimited distribution of regular cards and the guaranteed uniqueness of special collectibles.
ResourceManager
The ResourceManager enables you to interact with existing Resources on the Ootle. Whereas ResourceBuilder builds resources with specific criteria (for example, defining the ResourceAccessRules on the resource), ResourceManager is used to interact with the Resource once created. Actions include querying the current supply of the resource, minting new tokens, freezing tokens and updating ResourceAccessRules.
Example:
In our CCG, we need to be able to mint a card to add to the pack that we are selling. We would also like to be able to check how many cards are in the wild of a particular type. We can use the ResourceManager to do so by calling on the mint_fungible and total_supply methods of the ResourceManager
use tari_template_lib::prelude::*;

/// Mint more cards of an existing fungible card resource and add them to a pack
pub fn mint_existing_fungible_card_to_pack(
    resource_manager: &ResourceManager,
    card_resource_address: ResourceAddress,
    amount: Amount,
) -> Bucket {
    // Mint the requested amount of cards into a new bucket
    let minted_bucket = resource_manager.mint_fungible(card_resource_address, amount);
    // minted_bucket contains the new cards to add to a pack
    minted_bucket
}

/// Check the current supply of a particular card type (fungible resource)
pub fn get_card_supply(
    resource_manager: &ResourceManager,
    card_resource_address: ResourceAddress,
) -> Amount {
    resource_manager.total_supply(card_resource_address)
}
Template Incorporating Vaults and Buckets
The counter template above is extremely simple - create a component on the Ootle, store a value in it and increment it. However, most of the interactions you will be with more complex models and structs.
Consider the following example: you'd like to be able to mint your own meme coin, then distribute it freely to participants. You need to be able to burn these tokens if necessary, as well as track the total supply.
Fortunately, we already have a fungible template. You can generate it from the Tari CLI, but let's go through it here:
use tari_template_lib::prelude::*;

#[template]
pub mod fungtoken {
    use super::*;

    pub struct Fungtoken {
        vault: Vault,
    }

    impl Fungtoken {
        pub fn mint(initial_supply: Amount, token_symbol: String) -> Component<Self> {
            let coins = ResourceBuilder::fungible()
                .with_token_symbol(&token_symbol)
                .initial_supply(initial_supply);

            Component::new(Self { vault: Vault::from_bucket(coins) })
                .with_access_rules(AccessRules::allow_all())
                .create()
        }

        pub fn vault_address(&self) -> ResourceAddress {
            self.vault.resource_address()
        }

        pub fn take_free_coins(&mut self, amount: Amount) -> Bucket {
            self.vault.withdraw(amount)
        }

        pub fn balance(&self) -> Amount {
            self.vault.balance()
        }

        pub fn burn_coins(&mut self, amount: Amount) {
            let bucket = self.vault.withdraw(amount);
            bucket.burn();
        }

        pub fn total_supply(&self) -> Amount {
            ResourceManager::get(self.vault.resource_address()).total_supply()
        }
    }
}
Let's go through each function in the code to explain what it's doing:
    impl Fungtoken {
        pub fn mint(initial_supply: Amount, token_symbol: String) -> Component<Self> {
            let coins = ResourceBuilder::fungible()
                .with_token_symbol(&token_symbol)
                .initial_supply(initial_supply);

            Component::new(Self { vault: Vault::from_bucket(coins) })
                .with_access_rules(AccessRules::allow_all())
                .create()
        }
This function creates a new instance of the fungible token, called Fungtoken, and initializes it with an initial_supply of tokens, which is the amount of tokens minted. The ResourceBuilder::fungible() creates a fungible token resource. The with_token_symbol() method assigns a symbol to the token (like "USD" or "TARI"). The initial_supply() method specifies how many tokens should be minted initially.
The minted tokens are stored in a Vault using Vault::from_bucket(). The with_access_rules(AccessRules::allow_all()) sets the permissions on the vault; you can specify specific accounts and holders of NFTs access, but this particular line allows anyone to interact with this component. A new component is created from the Fungtoken structure, and the tokens are stored in the vault.
Bucket. withdraw(amount) removes a specific amount of tokens from the vault and returns them as a bucket. What is not shown here is necessarily what is done with the bucket following withdrawal.
This function returns the current balance of the fungible token in the vault.
pub fn burn_coins(&mut self, amount: Amount) {
    let bucket = self.vault.withdraw(amount);
    bucket.burn();
}
Bucket. Then, the burn() method is called on the Bucket, which destroys those tokens. Currently, the Ootle will panic if a bucket is attempted to be burned without the necessary permissions.
pub fn total_supply(&self) -> Amount {
    ResourceManager::get(self.vault.resource_address()).total_supply()
}
ResourceManager::get() method retrieves information about the resource using its address, and total_supply() gives the total number of tokens in existence for that resource.
Available Templates
The following templates have already been deployed to the network by default (You can view all currently deployed templates here):
- Account, XtraFaucet and AccountNFT are deployed by default on any new instance of the Ootle (for example, if you want to run your own local Swarm). This gives you, out of the box, templates from which to create accounts, send and receive transactions, create accounts, perform withdrawals and create proofs for confidential transactions.
XtraFaucetexists mainly to distribute free coins to the wallet, while AccountNFT let's you mint NFTs.
In addition, several templates have been written over the course of the Ootle's development. Below is a non-exhaustive list of templates from different projects:
- The Tari CLI tool, discussed in the Hackathon section, allows the user to create several pre-existing templates:
- The Tari Tex includes templates for implementing a modern DEX on the Ootle.
- Likewise, the Tariswap provides a similar implementation, but with a demonstration of leveraging the tari.js library for interactions via TypeScript
- Two templates for creating stable coins can be found here
- Lastly, wihtin the Ootle itself, there are several test templates that can be reviewed here
How to deploy create template projects and deploy on the Ootle
There are currently several methods that are available to deploy your contracts on the Ootle. We'll start with the recommended method and then touch on an alternative:
Recommended Method
The tari cli tool, located here, is used to generate template projects and create a couple of pre-existing templates for review. Instructions can be found on the main page of repo, but in short:
The above command will create a new skeleton project for template creation. Templates are then placed in the templates folder. To create a new template,
../tari new [...yourtemplatename...]
✅ Init configuration and directories
✅ Refresh project templates repository
✅ Refresh wasm templates repository
✅ Collecting available WASM templates
🔎 Select WASM template |
  Fungible Tokens - A Fungible Token template to create your own fungible token.
  NFT - A simple NFT template to create your own.
  Tari Swap - Token swapping template
  Counter - A basic counter example template that can be incremented.
You will have an option to select from the available templates to create a template. Note that you will be able to replace this template with your own.
The README.md on the project's main page provides all the instructions. The main difference here is that you will NOT need to use the tari-cli to deploy the template, as publishing the template can be done via the Ootle Wallet's web interface.
To generate the WASM file from the project, you can run the following command:
This will generate a .wasm file in the target/wasm32-unknown-unknown/release directory.
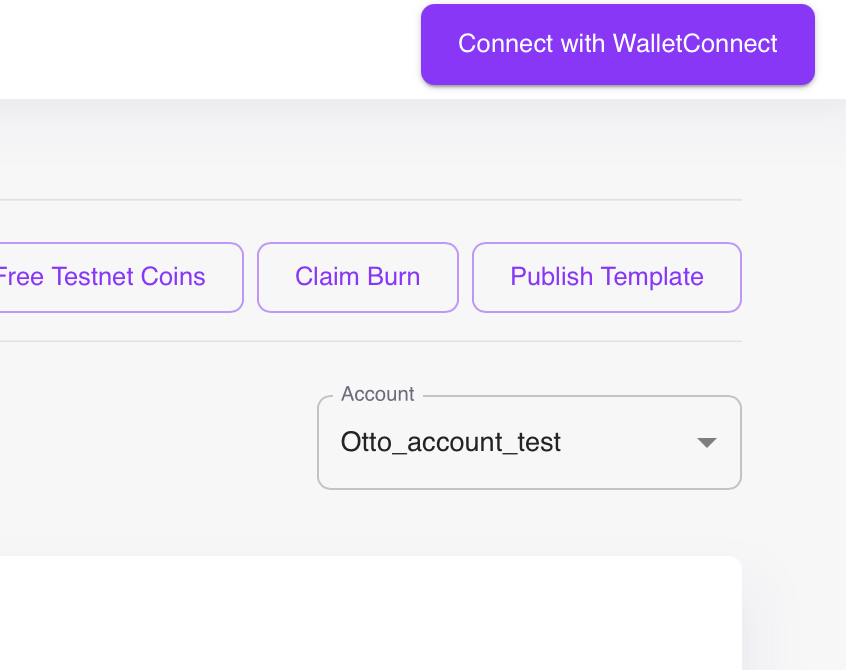
You can upload this file via the Publish Template button in your Wallet UI: